Michi
I dislike attempts to rewrite history
This is based on a King Arthur recipe, with only minor tweaks:


Sourdough rye beer bread
This is a 77% hydration dough, so it’s quite easy to handle. The crumb comes out fairly dense and chewy, with smallish holes. No big Swiss-cheese cavities that way, which is what a German-style rye bread is supposed to be like. Yet, it doesn’t have that really heavy and dense crumb that tends to turn people off German-style bread. (Unlike some other German breads, you cannot use this one as ballista ammunition during a siege.)
Overall, this is a hearty bread that goes extremely well with charcuterie, cheese, smoked fish, and similar foods. (It's definitely no good if you want to eat your bread with raspberry jam…)
The crust on this bread is to die for. The absolute best way to eat it is about 90 minutes after it has come out of the oven, with nothing on it but fresh butter and a few sea salt flakes. That literally is a slice of heaven.
Ingredients
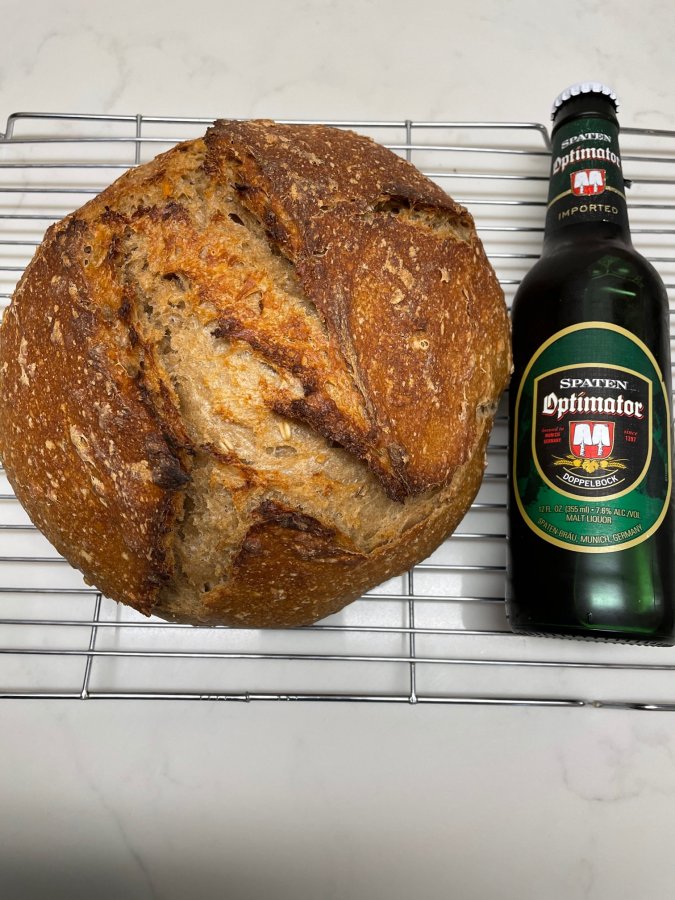
For the beer, I recommend something nice and dark, such as Bavarian Dunkel or Doppelbock, or a double stout. Be cautious with strongly-hopped beers, such as IPAs. The beer should be dominated by malt, not hops.
I suggest using a starter that has developed a decent amount of sourness, which really lifts the flavour.
In Bavaria, the most common addition to this bread is caraway seed. Half a teaspoon is about right. Alternatively, coriander seed is also also a popular ingredient used by a lot of Bavarian bakeries. (Don't use both caraway and coriander; two spices are not better than a single one.) If you use seeds, add them to the soaker with the beer.
Soaker:
- There is no water in this bread, only beer
")
- I use rolled rye flakes instead of malted wheat flakes
- I don't like honey in my bread, so I replaced it with rye malt syrup
- I increased the hydration a little because more beer is better
Sourdough rye beer bread
This is a 77% hydration dough, so it’s quite easy to handle. The crumb comes out fairly dense and chewy, with smallish holes. No big Swiss-cheese cavities that way, which is what a German-style rye bread is supposed to be like. Yet, it doesn’t have that really heavy and dense crumb that tends to turn people off German-style bread. (Unlike some other German breads, you cannot use this one as ballista ammunition during a siege.)
Overall, this is a hearty bread that goes extremely well with charcuterie, cheese, smoked fish, and similar foods. (It's definitely no good if you want to eat your bread with raspberry jam…)
The crust on this bread is to die for. The absolute best way to eat it is about 90 minutes after it has come out of the oven, with nothing on it but fresh butter and a few sea salt flakes. That literally is a slice of heaven.
Ingredients
For the beer, I recommend something nice and dark, such as Bavarian Dunkel or Doppelbock, or a double stout. Be cautious with strongly-hopped beers, such as IPAs. The beer should be dominated by malt, not hops.
I suggest using a starter that has developed a decent amount of sourness, which really lifts the flavour.
In Bavaria, the most common addition to this bread is caraway seed. Half a teaspoon is about right. Alternatively, coriander seed is also also a popular ingredient used by a lot of Bavarian bakeries. (Don't use both caraway and coriander; two spices are not better than a single one.) If you use seeds, add them to the soaker with the beer.
Soaker:
- 120 g rye flakes (can substitute wheat flakes, rolled oats, or malted wheat flakes)
- 113 g beer
- ½ tsp (or more to taste) caraway or coriander seeds (optional)
- 227 g ripe and very active sourdough starter
- 270 g beer
- 380 g strong bread flour
- 46 g wholemeal rye flour
- 21 g rye malt syrup
- 12 g salt
- Put rye flakes (and optional seeds) into a bowl and pour the beer over them. Stir to combine, cover, and let stand.
- While the soaker hydrates, combine starter, beer and flour, and mix until the dough forms a shaggy mass and comes together (about three minutes with a stand mixer on slow). No further kneading necessary; we don’t want gluten development at this point.
- Cover the dough and let it sit for 30 minutes (autolyse).
- Add the soaker, rye malt syrup and salt, and knead for about 8 minutes on medium with a stand mixer. Or knead by hand until the dough is really smooth and uniform.
- First rise: Slap and fold a few times, cover, and rest for an hour.
- Second rise: Slap and fold a few times, cover, and rest for an hour. The dough should pass or almost pass the window pane test now.
- Third rise: Slap and fold a few times, cover, and rest for an hour.
- Turn out the dough onto a floured surface, shape it into a ball with some surface tension, cover with a bowl or plastic wrap and let relax for 20 minutes.
- After that rest, do the final shaping for good surface tension and put the dough (seam side up) into a bowl lined with a floured cloth, or into a lined floured proofing basket (or similar). The bowl/basket shouldn’t be too large so the dough will retain its shape. (At this point, you could stick the whole thing into the fridge overnight and bake it the next day.)
- Final rise: Let the dough rise for anything between 2.5 and 6 hours (if not kept in the fridge overnight). Regardless of whether you ferment it overnight or not, the final rise time really depends on the dough, how active the starter is, and the temperature. Keep an eye on the dough level; it should rise by maybe 20-40% in height. Do the poke test to make sure it’s proofed, but not over-proofed. (Poking into it by just under a centimetre should make the dimple disappear within two to four seconds.) If the dough jiggles really loosely or starts to sink, it’s gone too far.
- An hour before the final rise is complete, preheat the oven to 260 ºC. If you want to bake on a stone, preheat the stone and put a cast iron skillet or heavy-gauge sheet pan in the bottom of the oven. If using a dutch oven, preheat the dutch oven (no skillet or sheet pan needed).
- To get the dough out of its bowl/proofing basket, use a piece of baking paper that is maybe 40 cm longer than the diameter of the loaf and put that on top of the basket. Then place a cutting board on top and flip the whole thing upside down, so the dough comes out of the basket and now sits on top of the cutting board and baking paper.
- Slash the dough. A central cross works well for round loaves. Cut fairly deep (about 1 cm) with a straight razor blade, or make a more curved cut with a curved blade at a 45 º angle to the dough surface for a nice ear.
- Lift the dough by holding the ends of the baking paper, either onto the baking stone or into the dutch oven. If using a baking stone, throw a decent handful (or a bit more) of ice cubes into the skillet before closing the door. With a dutch oven, put the lid on the dutch oven to retain steam.
- Bake for 30 minutes, then remove the lid from the dutch oven (or remove the skillet), reduce temperature to 230 ºC, and bake for about 20 more minutes. The minimum is probably an extra 15 minutes, but it could be as much as 25 minutes. Keep an eye on the colour and pull the loaf when it seems right. (Don’t be shy about letting it get quite dark.) The core temperature of the bread should be 95 ºC to 98 ºC when you pull it. If things get too dark on the outside, open the oven door to let out some heat, drop the temperature to 200 ºC, and bake a bit more until you get the right core temperature without burning things on the outside.
- Cool on a rack for at least 90 minutes before slicing.
Last edited: